
Closed blockout
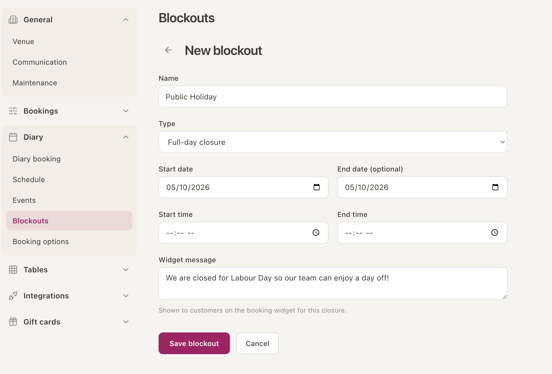
Use a closed blockout when your venue is shut for an extended period across consecutive days - for example, over a holiday break. Unlike other blockouts, a closed blockout lets you add a custom message that guests see on your booking widget while they're trying to book.
- Go to Venue Settings > Diary > Blockouts
- Select + New blockout.
- Select the Type from the dropdown menu as Full Day Closure.
- Select the Start date and End date (times not required).
- Add the message you want displayed on your booking widget under Widget message.
- Click Save.
Blockout by service
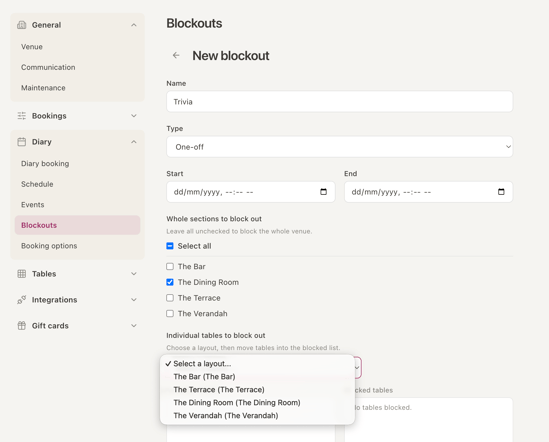
Use this to block out every table within a specific service - for example, a one-off trivia night - rather than a specific table or section.
In the Venue Settings
- Go to Venue Settings > Diary > Blockouts
- Select + New blockout.
- Select the Type from the dropdown menu as One off
- Select the Start date and End date
- Tick which Sections to blockout
- Select Save
Your blockout now appears on the timeline.
In the Diary View
- Click the three dots in the top right corner of the screen.
- From the pop-up menu, select New Blockout
- Select New Blockout. A window appears with two options - choose Blockout by Service then select Next
- Tick the Service you want to block i.e. lunch, dinner
- Select Create to save
Note: If two services share the same section, blocking out one also blocks the shared tables in the other - even though the second service isn't blocked out itself. For example, if your Trivia service uses the same sections as Dinner, blocking out Trivia also blocks those tables for Dinner. The blocked-out service still appears to customers online, but they won't be able to book it.